Expert Drain Channel with Grate Installation

On This Page

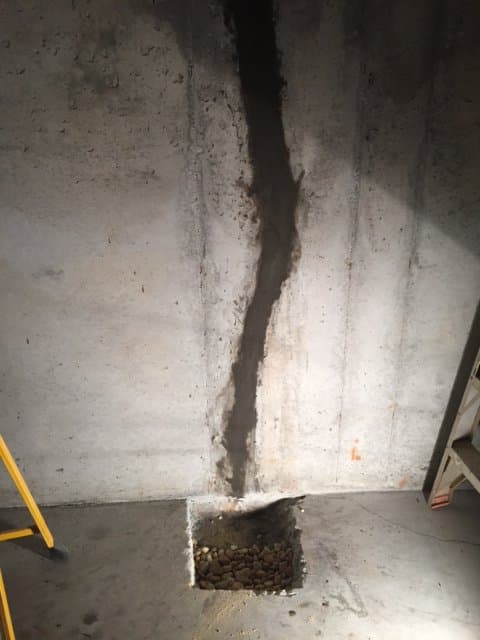
Ever wondered why water still finds its way toward your foundation after heavy storms?

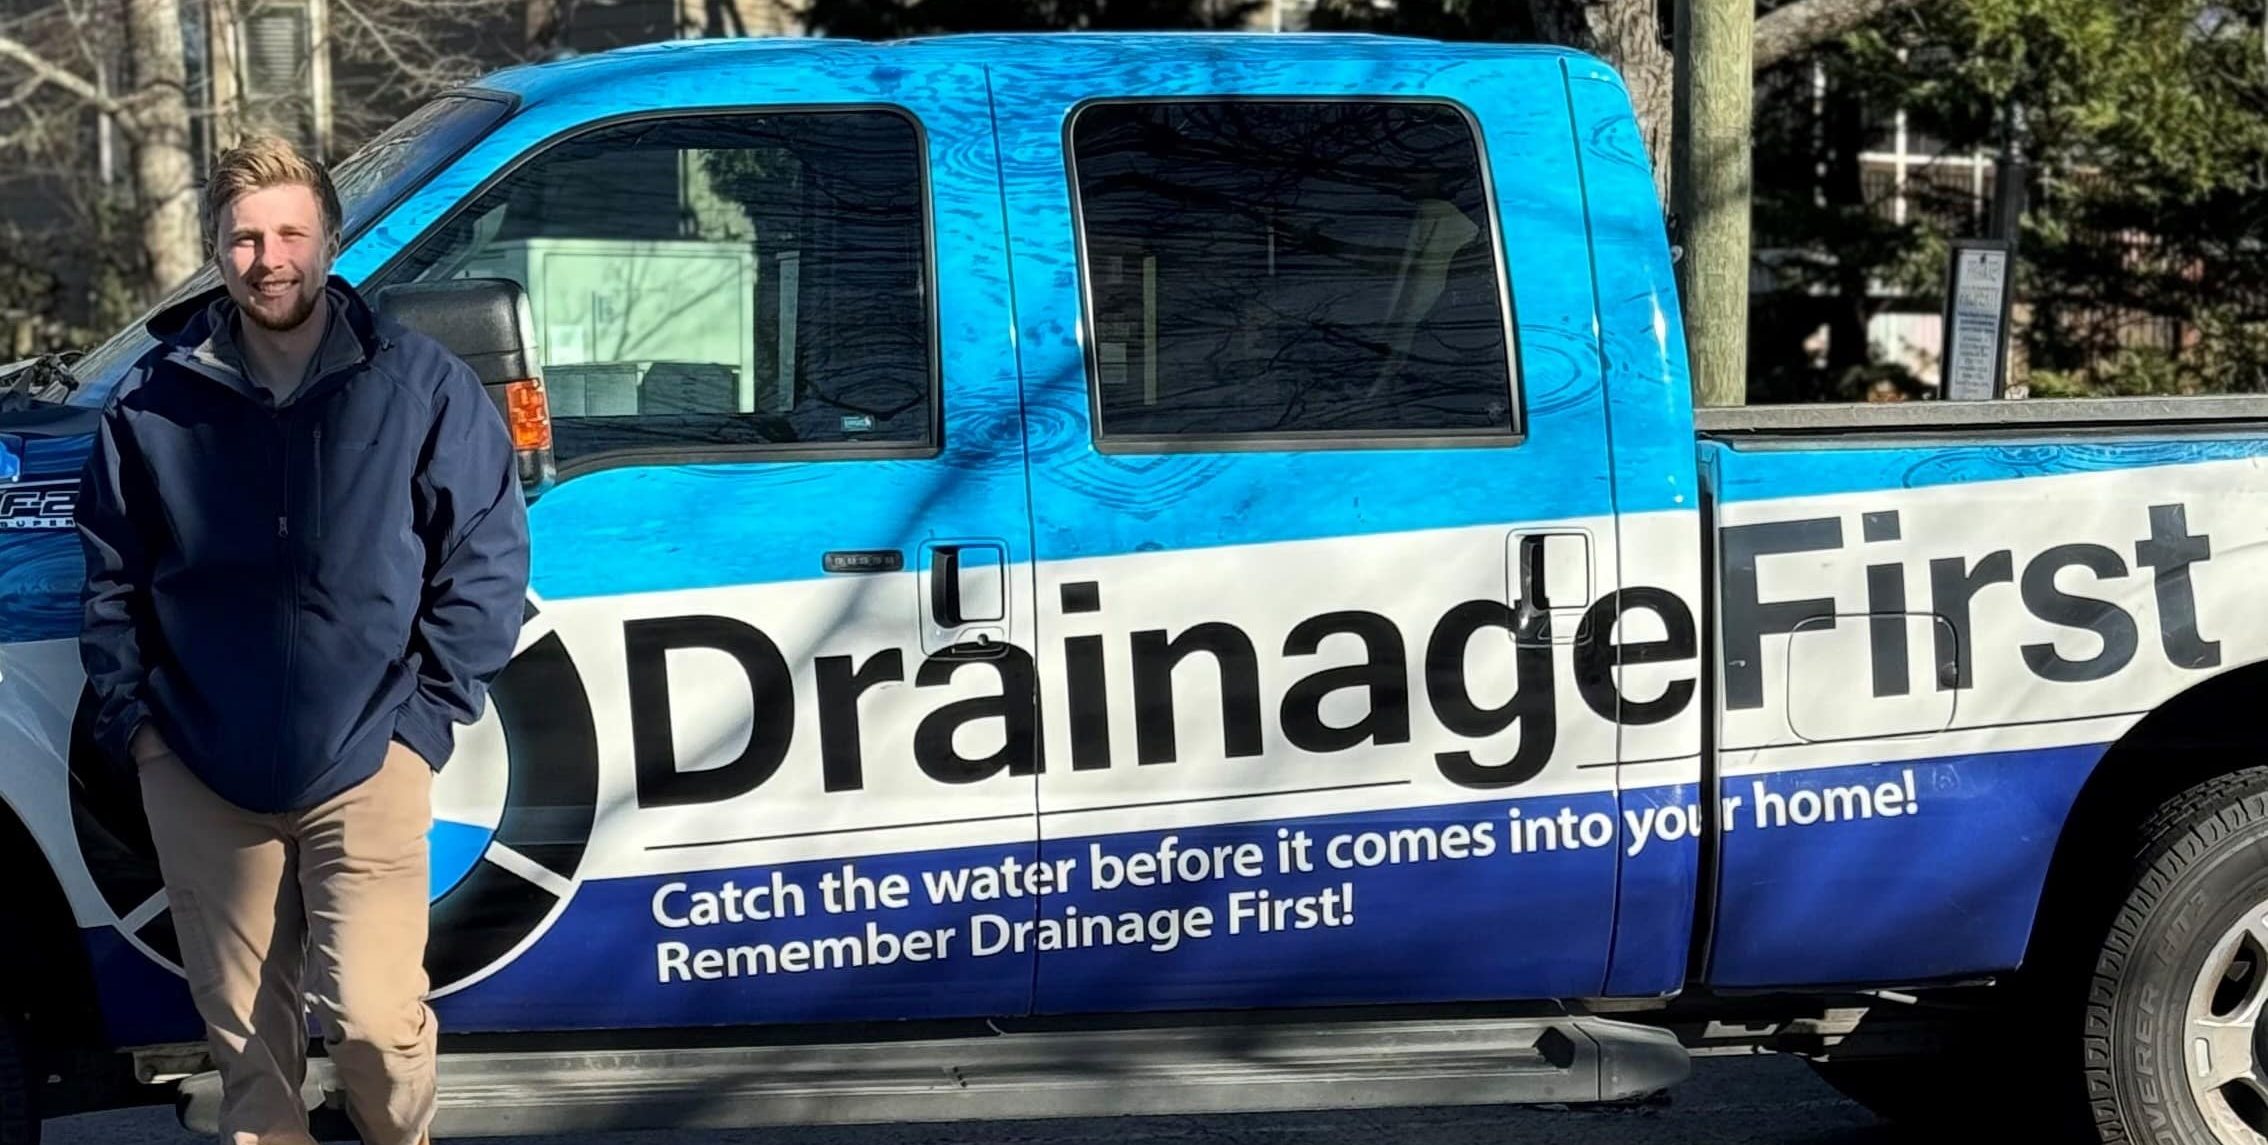
I’m the owner of Drainage First, and I’ve spent 20+ years solving that exact problem across Metro Atlanta. I explain in simple terms how a drain channel with grate intercepts surface water before it reaches slabs, garages, or basements. This approach often keeps you from costly interior fixes.

Modern modular kits make installation fast for common residential applications like driveways, patios, and pool decks. Most kits use stainless steel screws to fasten the grates and fit into a trench drain system that performs reliably when sized and sloped correctly.

We focus on practical fixes: plan, trench, base, dry-fit, concrete, pipe connection, and finalize grate fastening. I’ll point out failure points we fix in the field and keep safety and maintenance in view all the way.

Call us at (678) 389-9544 or email carter@drainagefirst.com to discuss solutions for your Atlanta property and stop flooding before it starts.

Key Takeaways

  • Surface interception prevents water from reaching foundations.
  • Modular kits speed installation and suit many residential applications.
  • Proper slope and outlet sizing avoid common failures.
  • Choose grates that match traffic and slip-resistance needs.
  • Drainage First offers owner-led estimates and hands-on service in Atlanta.

Planning Your Drain Channel with Grate System

Choosing the right parts before you dig cuts costs and prevents surprises. I’ve found that a clear plan often saves homeowners thousands by avoiding interior repairs later. In Metro Atlanta, our 20+ years of field work show that routing and discharge decisions are the real money-savers.

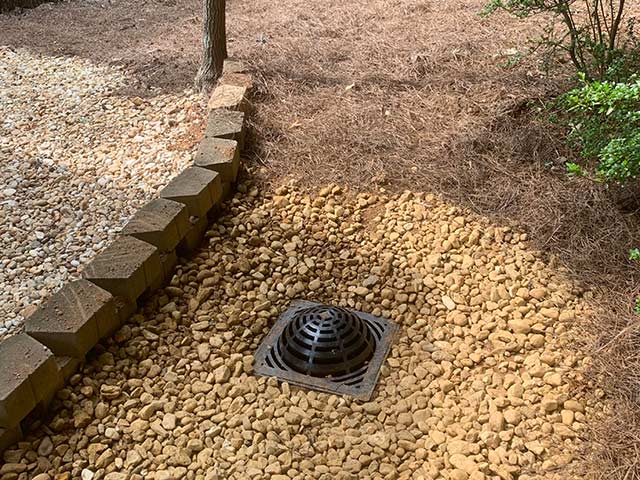
I start by mapping common applications around the home: driveways collecting sheet flow, patios that puddle, walkways that funnel water, pool decks where safety matters, and garage or basement entries where runoff becomes interior seepage.

A detailed architectural plan of a drain channel with a grate system, showcasing a perspective view from above. In the foreground, a blueprint is laid out on a drafting table, featuring precise measurements and design notes, with different sections of the channel and grate highlighted. In the middle ground, a realistic three-dimensional model of the drain channel is displayed, surrounded by tools like a ruler, a compass, and engineers’ notebooks, suggesting a professional planning environment. The background features a well-lit workspace with large windows allowing natural light to illuminate the scene. The atmosphere is focused and professional, conveying a sense of meticulous planning and engineering expertise. The image is visually balanced and organized, capturing the essence of planning a complex drainage solution.

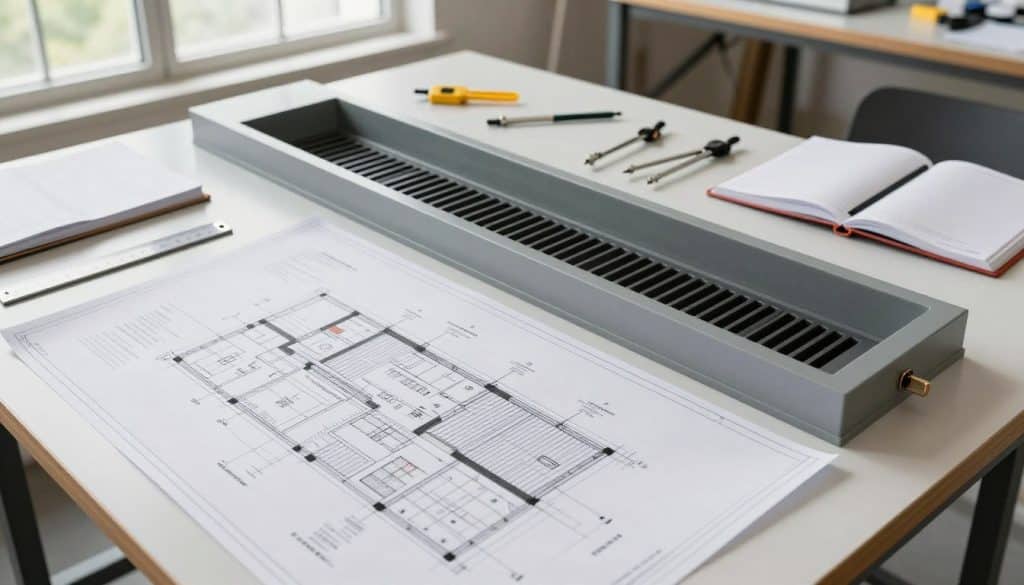
Pick channel size based on expected flow. Deeper sections move more water during heavy storms. Decide on end versus bottom outlets early—bottom outlets save surface length but affect trench depth and pipe routing.

  • Materials: galvanized steel for light residential loads, stainless steel for corrosion resistance and higher load needs, and ductile/cast iron for heavy traffic.
  • Load classes: A (3,300 lbs), B (27,500 lbs), C (55,000 lbs), D (88,000 lbs) — match the grate to real vehicle use.
  • Modular features: look for interlocking joints, slide-in end caps/outlets, and knockout bottom outlets sized for 3″ and 4″ fittings.

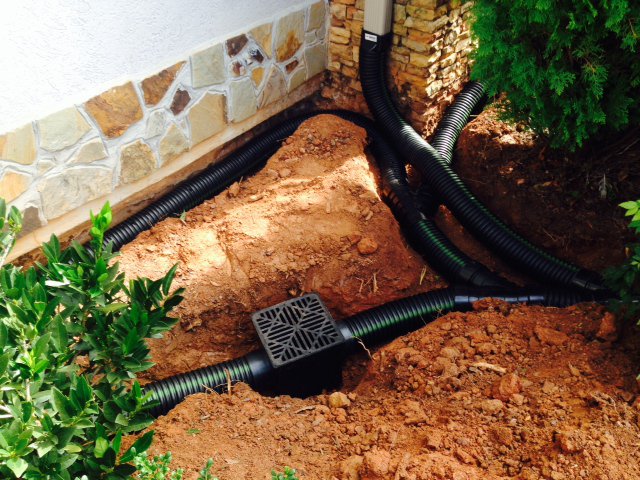
Plan discharge routes to daylight downslope or tie into approved solid pipe away from foundations. Verify pipe compatibility (S&D, SCH40, SDR35) against the product spec sheet before you cut.

We provide same-day written estimates across Metro Atlanta. Call (678) 389-9544 or email carter@drainagefirst.com to lock in a plan that saves you time and money.

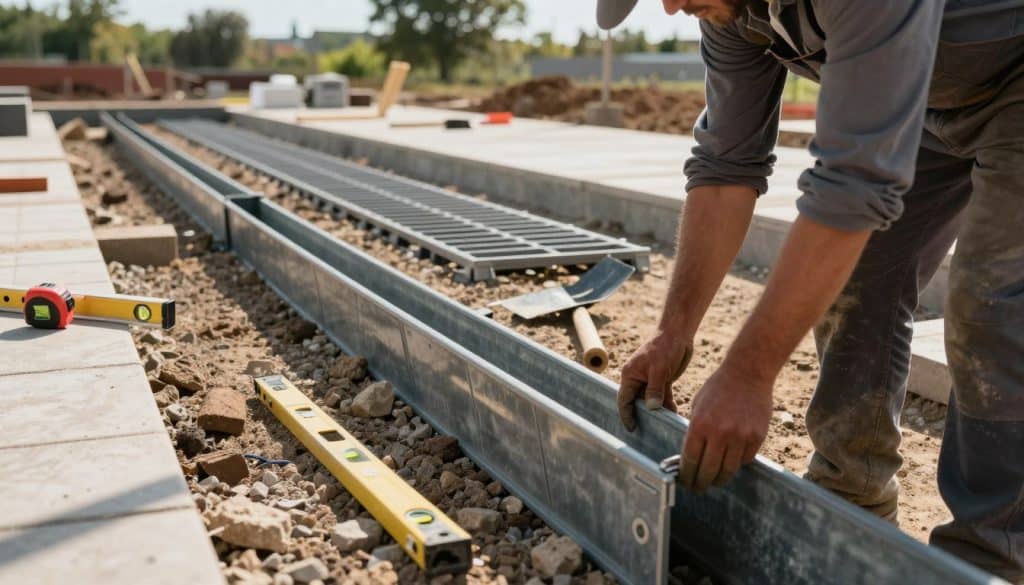
How to Install a Trench Drain Channel and Grates

Start by watching how water moves across the surface during a storm. Mark the high side and the low side. That observation sets a reliable layout line and slope before any digging.

A detailed trench drain installation scene depicting a construction site. In the foreground, a skilled worker in professional attire carefully positions a pre-cast trench drain channel on a prepared gravel base. The middle ground features several sections of drain channels lined up sequentially, with grates positioned above them, showcasing their installation process. Various construction tools lie nearby, such as a level, measuring tape, and a shovel. In the background, partially constructed pavements and a backdrop of trees under a clear blue sky add context to the setting. The lighting is natural and warm, emphasizing a sunny day, with soft shadows cast by the tools. The overall atmosphere is one of professionalism and competence, conveying a sense of careful workmanship in the installation process.

Layout and slope

I set the line to catch sheet flow, then pitch the run so water never pools. Verify slope with a level and string. Aim for a steady fall into the outlet pipe so the system self-cleans when it runs.

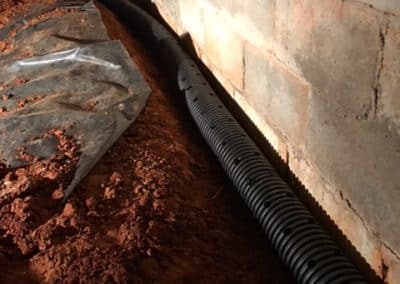
Excavation and base prep

Cut the trench wide enough for the modular 40″ sections and bedding. Use compacted gravel under the body so the unit sits rock-solid and remains level under load.

Dry-fit and accessories

Snap interlocking sections together and test end caps, end outlets, corners and knockout bottom outlets. Confirm outlet location before you set final depth.

  1. Rebar clips: Lock sections with rebar anchor points so they can’t float during the pour.
  2. Concrete encasement: Provide 4″-6″ under and along sides for heavy-duty ratings—this transfers wheel loads into the slab, not the plastic.
  3. Outlet tie-in: Match 3″ or 4″ S&D, SCH40, or SDR35 pipe sizes per the product spec sheet.

Finish by setting grates flush and fastening with stainless steel screws so they stay serviceable. My goal is simple: move water away from the house efficiently and affordably. Call (678) 389-9544 or email carter@drainagefirst.com for owner-led installation or repair.

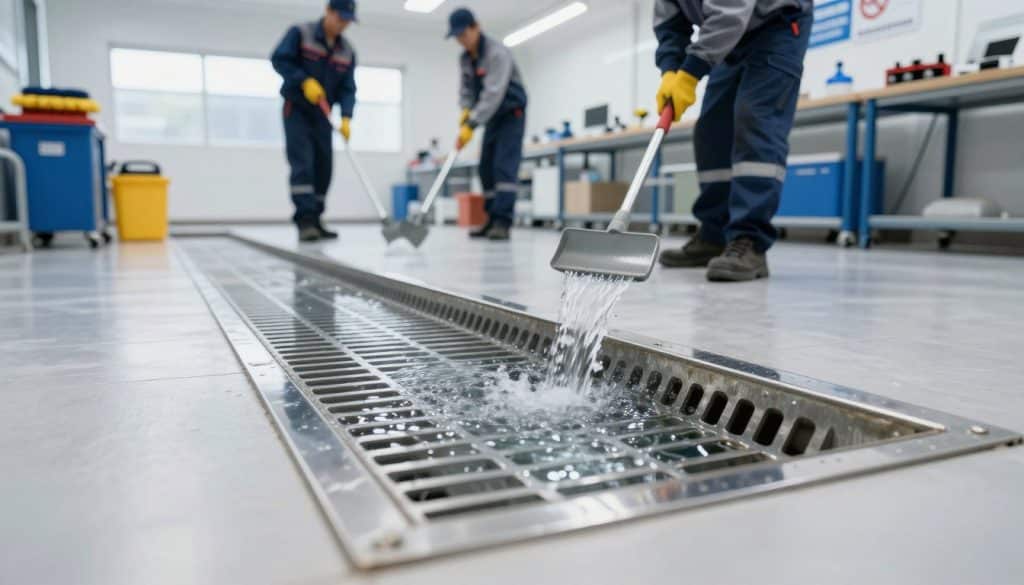
Maintenance, Cleaning, and Long-Term Performance

Simple checks after heavy rains prevent most common failures we fix in the field. I focus on quick, homeowner-friendly steps that keep exterior drainage working and stop basement or garage seepage.

Routine checklist

  • Remove surface debris and pine straw so water can enter the system.
  • Lift the grate carefully and rinse the channel; flush sediment toward the outlet.
  • Inspect joints and end caps for separation or shifting; tight joints keep flow steady into the pipe.

Protecting metal and long-term tips

Most systems use stainless steel fasteners, so grates come off for service. For plain steel or ductile iron, expect surface rust over time.

Practical care: wipe ductile/cast iron parts with a thin oil film now and then. Galvanized steel holds up longer in wet areas. Stainless steel keeps a cleaner look and resists corrosion.

  • Plan seasonal clean-outs in Metro Atlanta—leaf and clay buildup happen fast.
  • Replace items from your cart by matching size, load class, and fastener type so parts stay secure and flush.
  • Call us when water keeps returning, channels shift, or concrete cracks near the run: (678) 389-9544 | carter@drainagefirst.com.

An industrial maintenance drain in a commercial setting, featuring a sleek metal grate and clear flowing water. In the foreground, showcase the drain with intricate detailing of the grate's texture and water glistening under bright LED lights. The middle ground should depict workers in professional business attire, equipped with tools for cleaning and maintenance, demonstrating best practices. The background includes a well-organized workspace with cleaning equipment and signage about drainage maintenance, all brightly lit. The mood is focused and efficient, illustrating a commitment to cleanliness and long-term performance. Utilize a wide-angle lens to capture the entire scene, emphasizing the importance of proper installation and upkeep in a professional setting.

Conclusion

Stopping sheet flow at the surface prevents basement problems before they start. A properly planned channel and steel system redirects water away from the foundation. Match outlets, slope, and bedding to the product spec sheet so the run works long-term.

Choose materials for the job: galvanized steel or stainless steel for corrosion resistance, or heavier ductile options where traffic demands it. Keep grates serviceable with seasonal cleaning and quick inspections.

I lead owner-run visits across Metro Atlanta, Georgia and nearby areas. We give same-day written estimates and focus on practical, affordable fixes—not upsells. Call (678) 389-9544 or email carter@drainagefirst.com to schedule an assessment and get the job done right.

FAQ

What areas around my Atlanta home benefit most from a trench drain system?

I recommend installing a trench-style system at driveways, patios, walkways, pool decks, garages, and basements. These spots collect runoff and need a reliable way to move water away from foundations and walking surfaces. Proper placement prevents erosion, staining, and basement seepage.

How do I pick the right channel size and outlet style before digging a trench?

Start by estimating peak flow from the contributing roof or pavement area. Choose a channel width to handle that flow and match an outlet style that ties into planned piping — 3-inch or 4-inch connections are common. Plan your discharge point so water leaves the property or connects to an existing storm line.

Which grate material should I choose: galvanized steel, stainless steel, or ductile iron?

Select material based on exposure and load. Stainless steel resists corrosion in wet, coastal, or pool areas. Galvanized steel works well for general residential use when budget matters. Ductile or cast iron is best for heavy-traffic driveways. I help homeowners match performance to cost.

How do I ensure the grate meets load and safety requirements, including ADA concerns?

Match grate load rating to the area — pedestrian, light vehicle, or heavy vehicle. Choose heel-proof, ADA-compliant grates where people walk barefoot or in heels. For driveways, pick heavy-duty profiles and confirm slots won’t trap heels or small wheels.

What features should I look for in a modern modular trench system?

Look for interlocking joints, integrated end caps and outlets, and bottom outlet options for easy pipe connection. Modular systems speed installation, reduce leak risk, and allow clean changes or expansion later on.

Which pipe and fittings are compatible with typical channel outlets?

Most systems accept 3-inch and 4-inch connections. Check compatibility with S&D fittings, SCH40, or SDR35 pipe types depending on local code and how far you’ll run the line. I can advise which combination fits your soil and slope.

How do I set proper layout and slope for a trench drain to capture runoff effectively?

Establish a straight channel line that follows the surface contour and grade the channel with a slight slope toward the outlet — typically 1% to 2% — to keep water moving. I help mark lines and check slopes before you dig.

What excavation and base prep steps keep the channel stable?

Excavate to the manufacturer’s depth and width, add a compacted stone bedding, and use a level to check alignment. A firm, well-compacted base prevents settling and keeps the unit stable under load.

Should I dry-fit sections and accessories before pouring concrete?

Yes. Dry-fitting end caps, outlets, corners, and any bottom outlet knockouts ensures parts line up. This avoids surprises during final placement and concrete encasement.

Do I need rebar anchoring or special clips when setting the channel in concrete?

Use built-in anchor points or manufacturer clips to pin the channel while you pour. Rebar or anchors tied into the surrounding concrete prevent movement and maintain level during curing, which is essential for heavy-duty installations.

How should concrete be placed around the channel for durability?

Encase the sides and underside with proper concrete thickness as specified for the load rating. Consolidate concrete around the unit to eliminate voids. Proper encasement prevents damage from heavy loads and freeze-thaw cycles.

How do I connect the trench outlet to 3-inch or 4-inch pipe to route water away?

Use the channel’s bottom or side outlet and a compatible adapter to tie into SCH40, SDR35, or S&D piping. Maintain slope away from the foundation and secure fittings to avoid leaks. I can help plan the routing to an approved discharge point.

What’s the best way to secure and finish the grate for a clean look?

Fasten grates with stainless steel screws or locking clips and make sure the top is flush with surrounding concrete or pavers. A tight, level finish prevents trip hazards and looks professional.

What routine maintenance keeps a trench system working long-term?

Perform regular checks: clear leaves and debris, rinse the channel, inspect joints and end caps, and tighten grate fasteners. Seasonal cleaning prevents buildup and maintains flow capacity.

How do I protect metal grates from corrosion over time?

Rinse off salt and chemicals, apply appropriate protective coatings if recommended, and replace heavily corroded parts with stainless or ductile options. Simple, periodic care extends service life significantly.

Best Solutions

We have experience with a wide range of water issues.

See our Work

View our amazing drainage transformations.

Free Estimate

Contact us today to schedule a free consultation.

Services We Offer

What Our Customers Are Saying

Customer satisfaction is at the heart of everything we do. But don’t just take our word for it – hear what some of our happy clients have to say:

Drainage First - About Us - Contact Us

Call us now for your free estimate
24/7 Service Available

Share:

Learn More, Check Out

Send Us a Message